
Installing Condor on your Windows machine
What is this about?
This tutorial shows you how to add your machine to the Biocomputation/Adaptive System
PC cluster at UH. There are lots of screen shots to make this not too hard.
Or go to the overview page
Step 1: Download the software
Do this by going to the Condor downlaods page at
http://www.cs.wisc.edu/condor/downloads/.
Select from the row "Latest Stable Release" the closest location. This leads you
to their harmless License agreement, at the bottom of the page fill in your details and press "Agree":

On the next page you choose the version of Condor appropriate for Windows:
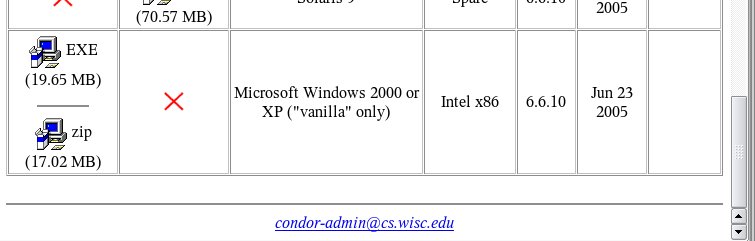
Select "EXE" and download the file to your disk, preferably to the desktop.
Step 2: Install Condor
Condor welcomes you, press "Next":

To be very sure, they want you to agree to the license again; press "Yes":

Enter your user information and press "Next" again:

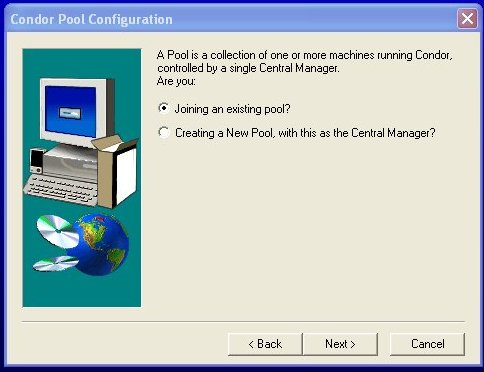
Tell the software that you want to join an existing pool:
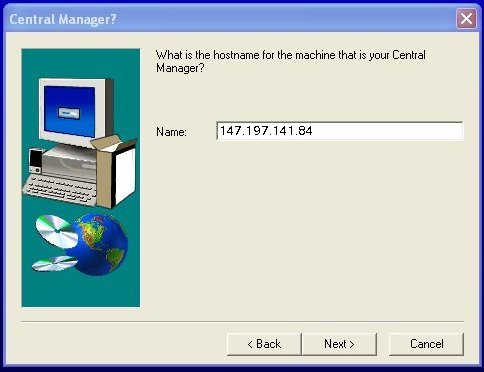
The Central Manager is called "147.197.141.84", please enter this in the field:
What roles do you want to take? Simply check both:

Where do you want the files to be put? If you can use "C:\Condor", otherwise make sure that the pathname does not include space (e.g. "Program files" would be bad!):

Condor needs to know where you have Java installed:

If you don't know where Java is located select "Search" from your Start menu:

In the search window choose to search for "All files and folders":

The filename Windows should look for is "java.exe", enter this and press "Search":

The search will take a while, be patient...

Most probably several "java.exe" files will be found, look for the newest one and memorize the folder this is in:

Enter the folder name where java.exe was found in into Condors setup form (if any part of the path name contains space characters, you have to truncate this part after 6 letters and add "~1", e.g. "C:\program files\java\jre_6_0_1" would become "C:\progra~1\java\jre_6_0_1") and, as always, confirm with "Next":

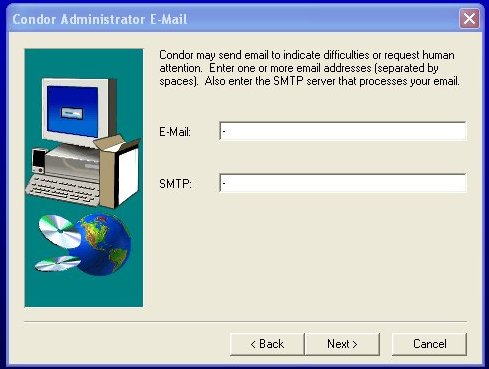
We can savely leave the Admin e-mail address empty, just put dashes:
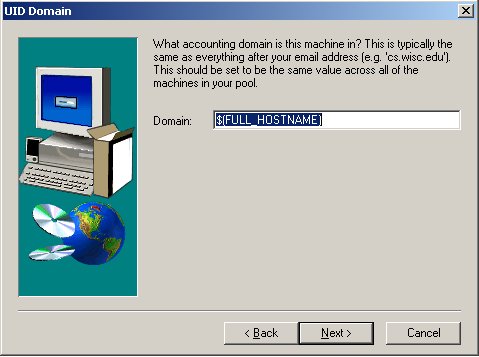
The domain should be set to "$(FULL_HOSTNAME)":
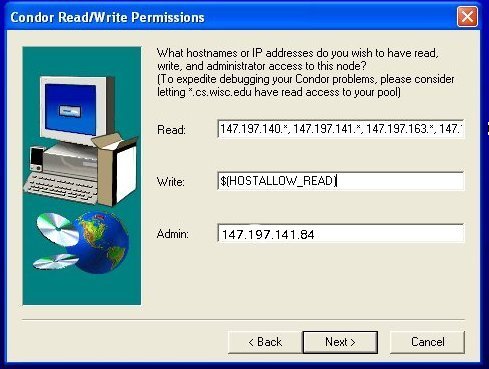
The read/write permissions are much more important, in the "Read" field enter
"147.197.140.*, 147.197.141.*, 147.197.163.*, 147.197.166.*". For the "Write" field we want the
same, but it is shorter to enter "$(HOSTALLOW_READ)". Admin is "147.197.141.84".
For the "Job start policy" select what you want, though I think "After 15 minutes of no console activity and low CPU activity" is good enough:

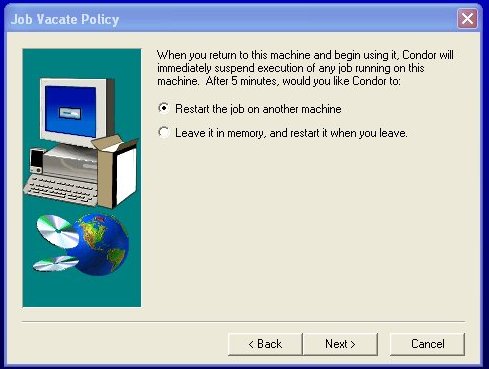
"Vacate policy" is about what happens when you return to your PC and thus need its computing
power yourself. "Restart the job on another machine" should do fine:
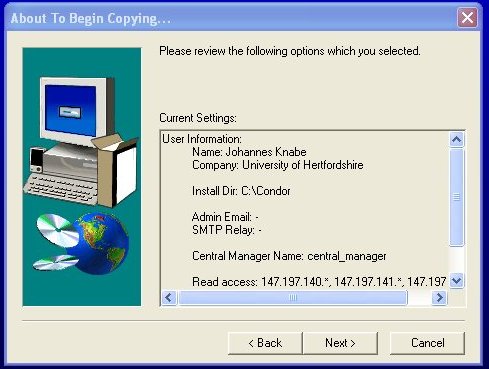
Confirm all details again:
... and copying begins:

Step 3: Finally
This is it - Condor should be up and running. Now only remember not to turn off or
restart your machine when it is not really necessary, so that Condor can run
jobs efficiently.
However, if you run into any problems please contact our mailing list (uhcluster@yahoogroups.com).
As it might become necessary to change the configuration at a later point or other relevant information
might become available, please subscribe to our cluster related mailing list by sending an empty mail to uhcluster-subscribe@yahoogroups.com
In response you will receive a confirmation; simply reply to this mail (with no changes) to complete subscription.
Also, comments on this tutorial are welcome as we want it to be incrementally improved.
Check installation
As Condor does not provide a graphical user interface you mightbe interested in whether it does
work and everything is fine. To do this you have to open a DOS box by selecting "Run" from your
"Start" menu. In the text field of the appearing form write "cmd" (for command-line) and press Return.
In the black DOS/command-line box type "cd \Condor\bin" (assuming you installed it to the default
path), press Return. Now typing "condor_status" should give you a listing of all computers in the
cluster and their state - including your machine (however it might take a minute after installation is
complete before you are listed). It should look similar to this:
Name          OpSys       Arch   State      Activity   LoadAv Mem   ActvtyTime

BG1           LINUX       INTEL  Claimed    Busy       1.080   512  0+02:58:43
BG2           LINUX       INTEL  Claimed    Busy       1.090   512  0+02:32:54
BG4           LINUX       INTEL  Claimed    Busy       1.010   501  0+01:28:30
BG5           LINUX       INTEL  Claimed    Busy       1.070   512  0+01:28:09
BG7           LINUX       INTEL  Claimed    Busy       1.010   501  0+00:09:43
DrLust        LINUX       INTEL  Claimed    Busy       1.110   375  1+22:22:51
EvilDr        LINUX       INTEL  Claimed    Busy       1.070   375 25+23:45:39
vm1@bagend    LINUX       INTEL  Claimed    Busy       1.100   512  0+22:40:37
vm2@bagend    LINUX       INTEL  Claimed    Busy       1.070   512  0+15:18:22
vm1@bombadil  LINUX       INTEL  Claimed    Busy       1.030   512  0+18:21:30
vm2@bombadil  LINUX       INTEL  Claimed    Busy       1.040   512  0+19:06:19
condor-manage LINUX       INTEL  Claimed    Busy       1.120   512  0+06:50:40
klyubin       LINUX       INTEL  Claimed    Busy       1.060   512  0+02:14:22
woodhouse     LINUX       INTEL  Claimed    Busy       1.010   512  0+01:42:00
jknabe.site   LINUX       x86_64 Claimed    Busy       1.240  1024[?????]
ASRG          WINNT50     INTEL  Claimed    Busy       2.270   512  0+02:12:20
BG6           WINNT51     INTEL  Claimed    Busy       2.150   512  0+01:41:00
BG8           WINNT51     INTEL  Claimed    Busy       1.920   512  0+07:40:01
BG9           WINNT51     INTEL  Claimed    Busy       1.580  1024  0+02:32:17
BlobLaptop    WINNT51     INTEL  Claimed    Busy       3.430  1023  0+02:46:52
vm1@Sven.feis WINNT51     INTEL  Claimed    Busy       2.430   511  0+03:15:06
vm2@Sven.feis WINNT51     INTEL  Claimed    Busy       5.810   511  0+03:14:50
vm1@ppichler. WINNT51     INTEL  Claimed    Suspended  1.030   511[?????]
vm2@ppichler. WINNT51     INTEL  Claimed    Suspended  0.910   511  0+00:00:00

                     Machines Owner Claimed Unclaimed Matched Preempting

         INTEL/LINUX       14     0      14         0       0          0
       INTEL/WINNT50        1     0       1         0       0          0
       INTEL/WINNT51        8     0       8         0       0          0
        x86_64/LINUX        1     0       1         0       0          0

               Total       24     0      24         0       0          0
|
I do not guarantee the correctness/adequateness of the data and the information given on this side and thus deny any responsibility for your use of it.
Johannes Knabe (jknabe@panmental.de)
v0.1 Hatfield, United Kingdom, 07.02.2006 (2006/07/02)
My Homepage is http://panmental.de